|
How do I setup my Internet and E-mail Account in Windows 2000 Pro? |

|

|

|
|
The screenshots supplied in this section all relate to Microsoft Windows 2000.
- Click on "Start" in the bottom left hand corner of the
screen. Move to "Settings" and Click on "Network and Dial-Up
Connections".

- Double left-click on "Make new Connection".

- Click "Next" on the Network Connection Wizard.
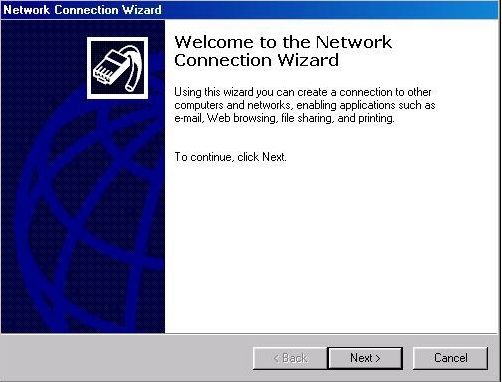
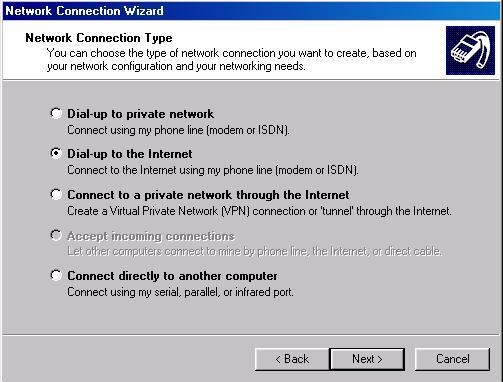
- Select the second option ("Dial-up to the Internet") and click "Next".
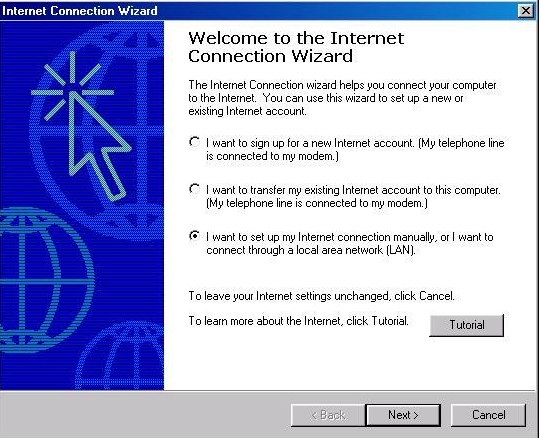
- Select the third option ("I want to set up my Internet connection
manually or I want to connect through a local area network (LAN)") and
click "Next".
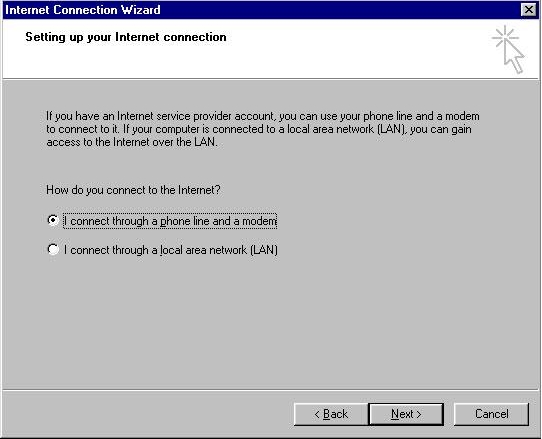
- Select the first option ("I connect through a phone line and a modem") and click "Next".
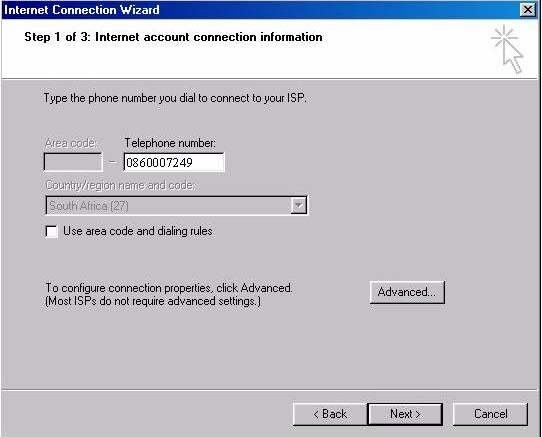
- Type in the Internet Dial-Up number provided by Maxitec. If you
need to dial a zero (0), or any other number, to access an outside line
(e.g. dialing through a switchboard), then the 0 (or the other number
that you need to dial) must be in front of the area code, followed by
the Dial-Up number. i.e.: 0, code, number (0,0212345678).Select South
Africa in "Country/region name and code". Uncheck "Use area code and
dialing rules" and click "Next"
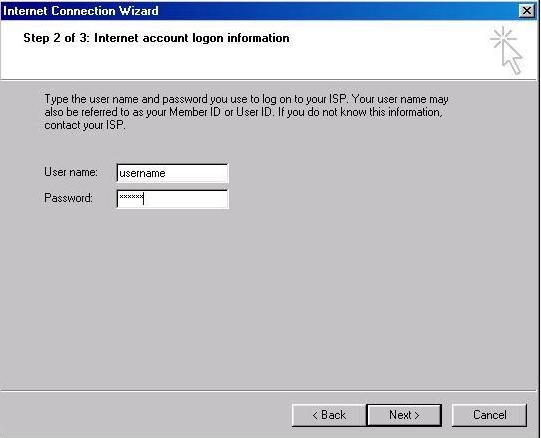
- Fill in your username and your password. Note that the username
and password are case-sensitive. The username is always in lowercase,
Click "Next"
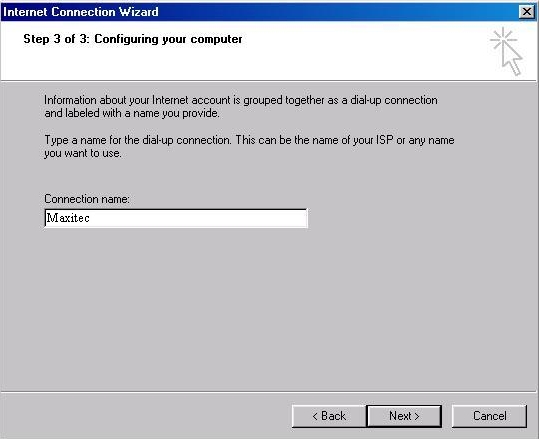
- Type in the connection name of your choice, e.g. ("Maxitec, My Connection, Home, etc..."). Click "Next".
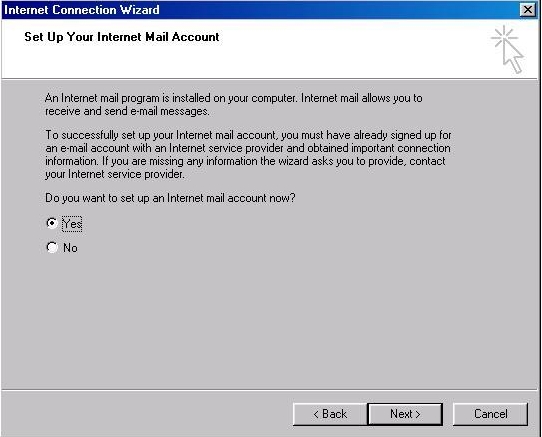
- It will then ask you “Do you want to set up an Internet mail account now?”, select "Yes"
Click "Next"
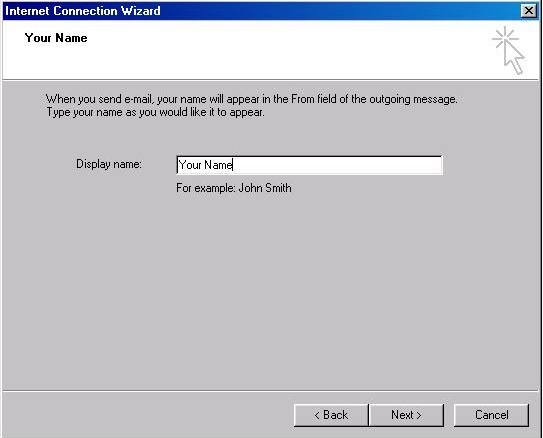
- Type in your name and surname, or your company name (capital letters, or in lowercase).
When someone receives an e-mail from you, this name will appear in the 'From' section of the e-mail. Click "Next"
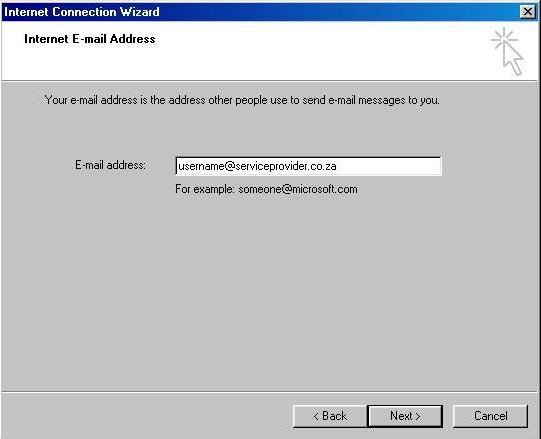
- Type in your e-mail address in lowercase and click "Next".
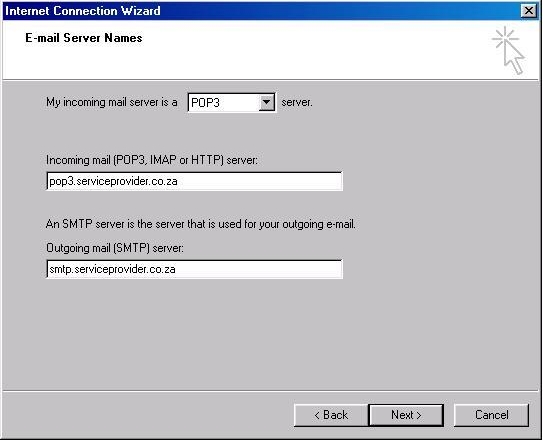
- Select "POP3" as your incoming mail server type. Type the
"Incoming and Outgoing" mail server names in lowercase in the relevant
spaces. Click "Next"
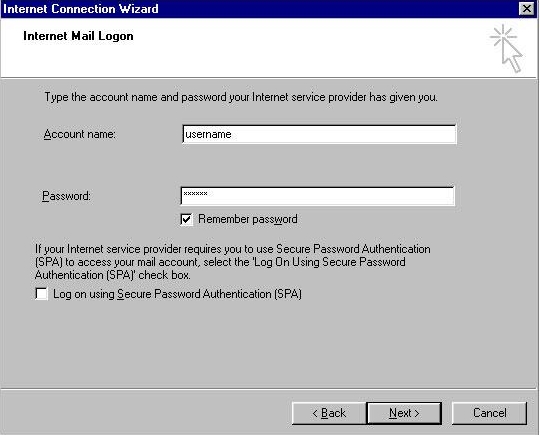
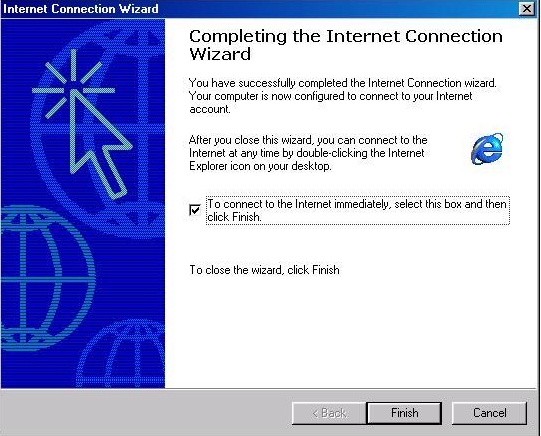
- Fill in your username your password. Note that the username and
password are case-sensitive. Selecting "Remember password" is optional.
Do not check "Log on using Secure Password Authentication (SPA)." Click
"Next"
|
 FAQs
FAQs  How do I setup my Internet and E-mail Account in Windows 2000 Pro?
  FAQs
FAQs  How do I setup my Internet and E-mail Account in Windows 2000 Pro?